
Car Seat Installation Basics Every Parent Should Know
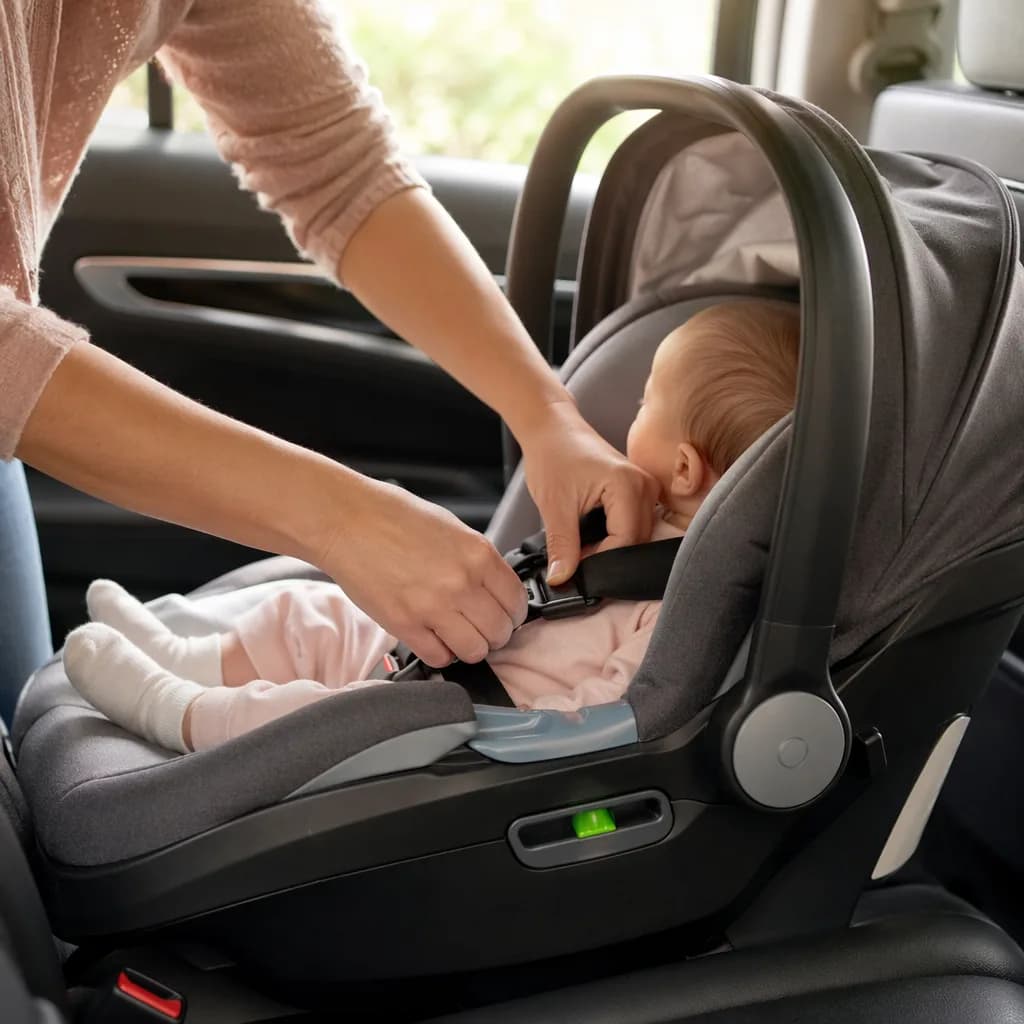
Start With the Manual Before You Touch the Seat
Before you click, tighten, or tug anything, grab two manuals: the car seat manual and your vehicle owner’s manual. I know. It feels like the least exciting part of parenting gear. But this is where the real instructions live, including which seating positions are approved and which installation methods are allowed.
Your vehicle manual should tell you where a car seat can go in the back seat, and whether LATCH can be used in that spot. Your car seat manual should tell you how that specific seat must be installed, plus the height, weight, and age limits for rear facing, forward facing, or booster mode. Those limits matter because children should move between seat types based on size and stage, not just birthday candles.
A common example: the middle seat may look like the safest choice, and it often feels like the obvious pick. But many vehicles don’t allow lower anchors in the center position. In that case, you may need to install the seat there with the seat belt, if both manuals allow it, or choose an approved side seating position with LATCH.
Use either the LATCH system or the seat belt to secure the seat, not both, unless your car seat manual specifically says otherwise. Also check LATCH weight limits. Once the combined weight of your child and the seat exceeds 65 pounds, seat belt installation is usually recommended instead.
This is the same calm, step-by-step thinking we use for other safety basics, like checking Rear Facing Car Seat Guidelines for Safer Rides, working through a Babyproofing Checklist: Room-by-Room Home Safety, or setting up a safer sleep space with our Safe Sleep Newborn Guide: Reduce SIDS Risk. One page at a time. One correct choice at a time.
Choose Seat Belt or LATCH, Not Both
Here’s one of those car seat details that can trip up even careful parents: most car seats should be installed with either the vehicle seat belt or the lower anchors, not both. Unless your car seat manual clearly says using both is allowed, pick one method and do it well.
LATCH stands for Lower Anchors and Tethers for Children. It’s a standardized system that lets you secure a child seat without using the vehicle’s seat belt. It can make installation feel simpler, especially with forward-facing seats, but it has limits.
The key number to remember is 65 pounds combined. Once your child plus the car seat weighs more than 65 pounds, installation with the seat belt is usually recommended instead. That’s because lower anchors have weight limits, and the manual for both your car seat and your vehicle should spell out what applies to your setup.
If you’re using the seat belt, route it through the correct belt path, then lock the belt according to your vehicle’s instructions. Many loose installs happen because the belt is threaded correctly but never locked, so the seat can still shift. After tightening, tug at the base. It shouldn’t move more than one inch side-to-side or front-to-back.
LATCH isn’t automatically safer than a seat belt. The safer choice is the one you can install tightly and correctly every single time.
Also check the belt path label before you tighten anything. Rear-facing and forward-facing belt paths are usually different, and mixing them up can affect how the seat performs. If you’re still choosing a setup, our Rear Facing Car Seat Guidelines for Safer Rides can help you think through the next step calmly. It’s the same kind of careful checking we do with a Babyproofing Checklist: Room-by-Room Home Safety or a Safe Sleep Newborn Guide: Reduce SIDS Risk: small details, big protection.
The One-Inch Test for a Tight Installation
Here’s the check I wish every parent learned before the first ride home: test the car seat at the belt path, not at the top of the seat.
The belt path is the spot where the vehicle seat belt or lower anchor strap runs through the car seat. Give the seat a firm tug right there, side to side and front to back. A correctly installed car seat should move less than one inch in either direction at that belt path.
Don’t panic if the top of a rear facing seat wiggles more. That can be normal. Rear facing seats often have more movement near the head area because they’re secured down at the belt path, not locked in place from top to bottom. If the base is tight where the belt or lower anchors go through, you’re checking the right thing. For more on why rear facing setup matters, our Rear Facing Car Seat Guidelines for Safer Rides can help.
A practical trick: while tightening the seat belt or lower anchor strap, press down where your child’s bottom goes. Use your body weight. Then pull the strap snug and test again at the belt path.
Recheck the tightness after a few rides, after another adult moves the seat, and anytime you reinstall after cleaning or travel. It’s a lot like other safety habits, such as working through a Babyproofing Checklist: Room-by-Room Home Safety or reviewing a Safe Sleep Newborn Guide: Reduce SIDS Risk. Small checks add up.
Rear Facing Car Seat Tips That Prevent Common Errors
Rear facing is one of those car seat stages that can feel short, especially once your baby starts looking long and wiggly. But it’s worth slowing down here. Children should stay rear facing until they reach the maximum rear facing height or weight limit listed for their specific seat. Many mistakes happen because we rush to the next stage too early.
Start by checking the label on the side of the seat and the manual. The limit matters more than age alone. Stony Brook Medicine notes that rear facing seats help protect a child’s neck, spine, and head in a crash, especially for infants and babies. For a fuller age-and-stage breakdown, keep our Rear Facing Car Seat Guidelines for Safer Rides handy.
The recline angle matters too. Use the built-in level indicator on the seat, especially with newborns who need extra support for their head and airway. A seat that’s too upright can let a tiny baby’s head slump forward, and that’s the kind of detail that’s easy to miss when you’re installing the seat in a hot parking lot with a crying baby nearby.
For rear facing seats, harness straps should sit at or below your child’s shoulders. Buckle them snugly, then try the pinch test at the shoulder. If you can pinch extra webbing, tighten the harness. Keep the chest clip at armpit level.
Skip bulky coats, thick blankets under the harness, and aftermarket head pillows that didn’t come with the seat. Puffy layers can compress in a crash, and unapproved add-ons can interfere with protection. Use thin warm layers instead, with a blanket over the buckled harness if needed.
And those little feet pressing into the vehicle seat back? Usually not a reason to turn forward facing. Kids are bendy. Limits decide the next step.
Car safety sits right alongside the everyday safety habits we build at home, like using a Babyproofing Checklist: Room-by-Room Home Safety or following a Safe Sleep Newborn Guide: Reduce SIDS Risk. Tiny choices add up, whether you’re naming a baby Rami, Aurora, or still deciding.
Harness Fit Checks Before Every Drive
Before you start the car, take ten quiet seconds to check the harness. It’s one of those tiny habits that can make the whole ride safer.
First, buckle the harness flat. Look near the shoulders, across the belly, and down by the hips for twists. A twisted strap can look “close enough” when you’re rushing, but it won’t sit the way it should. Smooth it out before tightening.
Next, do the pinch test at the collarbone. Try to pinch the harness strap between your fingers right at your child’s collarbone. If you can pinch any slack, tighten it. The straps should be snug enough that your child can’t move too much in a crash, but still flat and comfortable against their body.
The chest clip belongs at armpit level. Not down on the belly. Not up near the neck. Armpit level helps keep the harness positioned over the strongest parts of the upper body.
Also check the crotch buckle position in your car seat manual. Some seats have more than one slot, and the right spot depends on your child’s size and the seat’s instructions.
Here’s a real-life moment many of us know: after preschool pickup, the straps you loosened during the morning rush can still look buckled and “done.” Then you try the pinch test and realize there’s extra slack. A quick tighten before pulling away is worth it.
Growth spurts can sneak up too. Recheck harness height after your child suddenly needs longer pants or their shoulders seem higher in the seat. Kids can outgrow a harness setting quietly.
For seat direction and stage changes, keep Rear Facing Car Seat Guidelines for Safer Rides nearby, just like you might keep a Babyproofing Checklist: Room-by-Room Home Safety for everyday safety checks at home.
Forward Facing Mistakes to Fix Right Away
Forward facing feels like a big milestone, but it still needs a careful setup. A forward facing harnessed car seat should use the top tether whenever your vehicle and car seat allow it. That tether is the strap that comes from the back of the car seat and connects to a metal anchor in the vehicle. It helps reduce forward head movement in a crash, which is exactly what we want to limit.
Check the harness next. In forward facing mode, the harness straps should come from slots at or above your child’s shoulders. If they’re below the shoulders, take a minute to rethread or adjust them according to your seat manual.
Also confirm the seat is actually set for forward facing use. Many convertible seats have different belt paths, recline settings, and angle rules depending on the direction they’re facing. Use the forward facing belt path, and set the recline only as your manual allows.
One common mistake is using the lower anchors for too long. The LATCH system has weight limits, and once the combined weight of your child and the car seat goes past 65 pounds, seat belt installation is usually recommended instead. Check both manuals.
And don’t rush the booster. A booster can seem easier, especially on busy mornings, but it only works if your child can sit correctly for the whole ride. If they lean, slouch, or tuck the belt under an arm, the harness may still be the safer choice.
If you’re moving up from rear facing, it can help to review our Rear Facing Car Seat Guidelines for Safer Rides before making the switch.
Common Car Seat Installation Mistakes Parents Miss
Car seats can look “right” at a quick glance and still have one small setup issue that matters. A calm five-minute check can catch a lot, especially after switching cars, washing the cover, or moving from rear-facing to forward-facing.
Here are the mistakes parents often miss:
- Using the wrong belt path for the seat’s current mode. Many convertible seats have one belt path for rear-facing and a different one for forward-facing. Check the labels and manual every time the mode changes.
- Leaving the seat belt unlocked during a seat belt installation. If you’re using the vehicle seat belt instead of LATCH, the belt usually needs to be locked so the car seat stays tight.
- Installing with both LATCH and the seat belt when the manual doesn’t allow it. It feels extra secure, but Stony Brook Medicine notes parents should use either LATCH or the seat belt, not both, unless the car seat manual specifically says it’s allowed.
- Placing the chest clip too low. The chest clip belongs at armpit level. If it’s down on the belly, the harness may not hold your child correctly in a crash.
- Using a seat that’s expired, recalled, damaged, or missing labels. Labels matter because they show height and weight limits, belt paths, and key warnings. If those are gone, it’s harder to confirm the seat is being used correctly.
- Adding products that didn’t come with the seat. Strap covers, mats, inserts, mirrors, and head supports can interfere with how the seat protects your child. Use only accessories approved by the car seat manufacturer.
- Forgetting to tighten again after moving the seat. A seat that was rock-solid in one car may shift in another. Tug at the base. It shouldn’t move more than one inch side-to-side or front-to-back.
- Letting the car seat touch the front seat when the vehicle or car seat manual says not to. This is one of those small manual details that’s easy to miss.
- Skipping the top tether on forward-facing seats. The top tether helps keep a forward-facing seat from moving forward in a crash. For more stage-by-stage help, our Rear Facing Car Seat Guidelines for Safer Rides pairs well with a home safety reset like this Babyproofing Checklist: Room-by-Room Home Safety.
When to Get a Car Seat Safety Check
A car seat check is one of those small appointments that can make you breathe easier. Try to schedule one before your baby is born, after buying a new seat, after switching cars, or any time you turn a seat forward facing. Those are the moments when little setup details can change.
A certified Child Passenger Safety Technician won’t usually just install the seat and send you home. The real goal is teaching you how to install it and use it yourself. They’ll watch you practice, help you tighten the seat properly, check the harness fit, point out the correct belt path or LATCH setup, and make sure the seat matches your child’s height and weight limits.
You can look for help through Safe Kids coalitions, hospitals, fire departments, police departments, and local inspection stations. If you’re already working through newborn safety tasks like a safe sleep setup or a room-by-room babyproofing checklist, add this appointment to the same list.
Bring the child if possible, the car seat manual, the vehicle manual, and enough time to practice without rushing. A sleepy Saturday morning is better than squeezing it in before an appointment.
And yes, it’s still worth going even if you feel pretty confident. Nearly half of car seats are installed or used incorrectly, so a second set of trained eyes can catch something simple, like a loose base or chest clip that’s sitting too low. If you’re still rear facing, this pairs well with reviewing rear facing car seat guidelines.
Frequently Asked Questions
How tight should a car seat installation be?
The car seat should move less than one inch side to side or front to back when you tug at the belt path.
Is LATCH safer than a seat belt for car seat installation?
No. LATCH and seat belt installations are both safe when used correctly. Choose the method allowed by the manuals that gives the tightest fit.
Can I use LATCH and the seat belt together?
Usually no. Use only one method unless your car seat manual clearly says using both is allowed.
Where should harness straps sit on a rear facing car seat?
For a rear facing car seat, harness straps should come from at or below your child’s shoulders.
When should my child stop riding rear facing?
Keep your child rear facing until they reach the maximum rear facing height or weight limit listed for their car seat.
Do I need the top tether for a forward facing car seat?
Yes, use the top tether whenever your car seat and vehicle allow it. It helps reduce how far a child’s head moves in a crash.
How often should I do a car seat safety check?
Check the seat every few rides, after anyone moves it, after cleaning, and any time your child changes modes or grows into a new harness setting.
Can my child wear a winter coat in the car seat?
Bulky coats can leave the harness too loose. Use thin layers, buckle snugly, then place a blanket or coat over the harness if needed.
Frequently asked questions
Should I install a car seat with LATCH and the seat belt together?
How do I know if my car seat is installed tightly enough?
Is LATCH safer than using the seat belt?
Can I use LATCH in the middle seat?
References
Sources
External research this article was grounded in.
- 2244 Used Cars In Lucknow, Second Hand Cars For Sale In Lucknow - CarWalecarwale.com
- Common Car Seat Mistakes Parents Make—And How to Fix Them - Stony Brook Medicine Health Newshealth.stonybrookmedicine.edu
- New Cars in 2026: New Car Prices in India | CarDekho.comcardekho.com
- Installing Your Car Seat | Safe Kids Worldwidesafekids.org
- Step-by-Step Guide to Installing Your Car Seat Properly & Safelyalexcar.com
Related reading
More from the journal → safety
Baby Proofing Checklist Before Crawling Begins
A calm room-by-room baby proofing checklist to help you spot choking hazards, sharp corners, cords, outlets, furniture tip risks, and more before crawling starts.
15 min readAug 3, 2026- safety
Baby Bath Safety: Temperature, Setup, Supervision
Simple baby bath safety tips for water temperature, setup, and supervision, so bath time stays warm, calm, and safe.
11 min readAug 3, 2026 - safety
How to Choose a Safe Newborn Car Seat
Choosing a newborn car seat? Start with rear facing fit, safe harness setup, labels, dates, and recall checks before that first ride home.
10 min readAug 3, 2026